Tutorial: Create the Input Flows
An input flow is a series of plugins that ingest data into the staging data hub. Input flows wrap incoming raw data in envelopes and store them in the staging database. The envelopes contain metadata, including those related to lineage and provenance; for example, who loaded the data, when it was loaded, and where it came from.
The QuickStart Run Input Flow wizard enables you to quickly start loading data without learning the intricacies of the underlying tools. When you run your flow, QuickStart loads data into MarkLogic Server using MarkLogic Content Pump (MLCP), a tool capable of importing a large volume of data into MarkLogic Server.
In this section, we create and run an input flow for each entity: Product, Customer, and Order. Each input flow performs the following:
- Load data from the sample data directory.
- Interpret the input data as delimited text (CSV), where each row is considered a document.
- Automatically generate a unique URI to identify the wrapped document as it is added to the staging server. This prevents one document from overwriting another if multiple rows contain the same value in the first field.
Product
1 - Create an input flow for the Product entity.
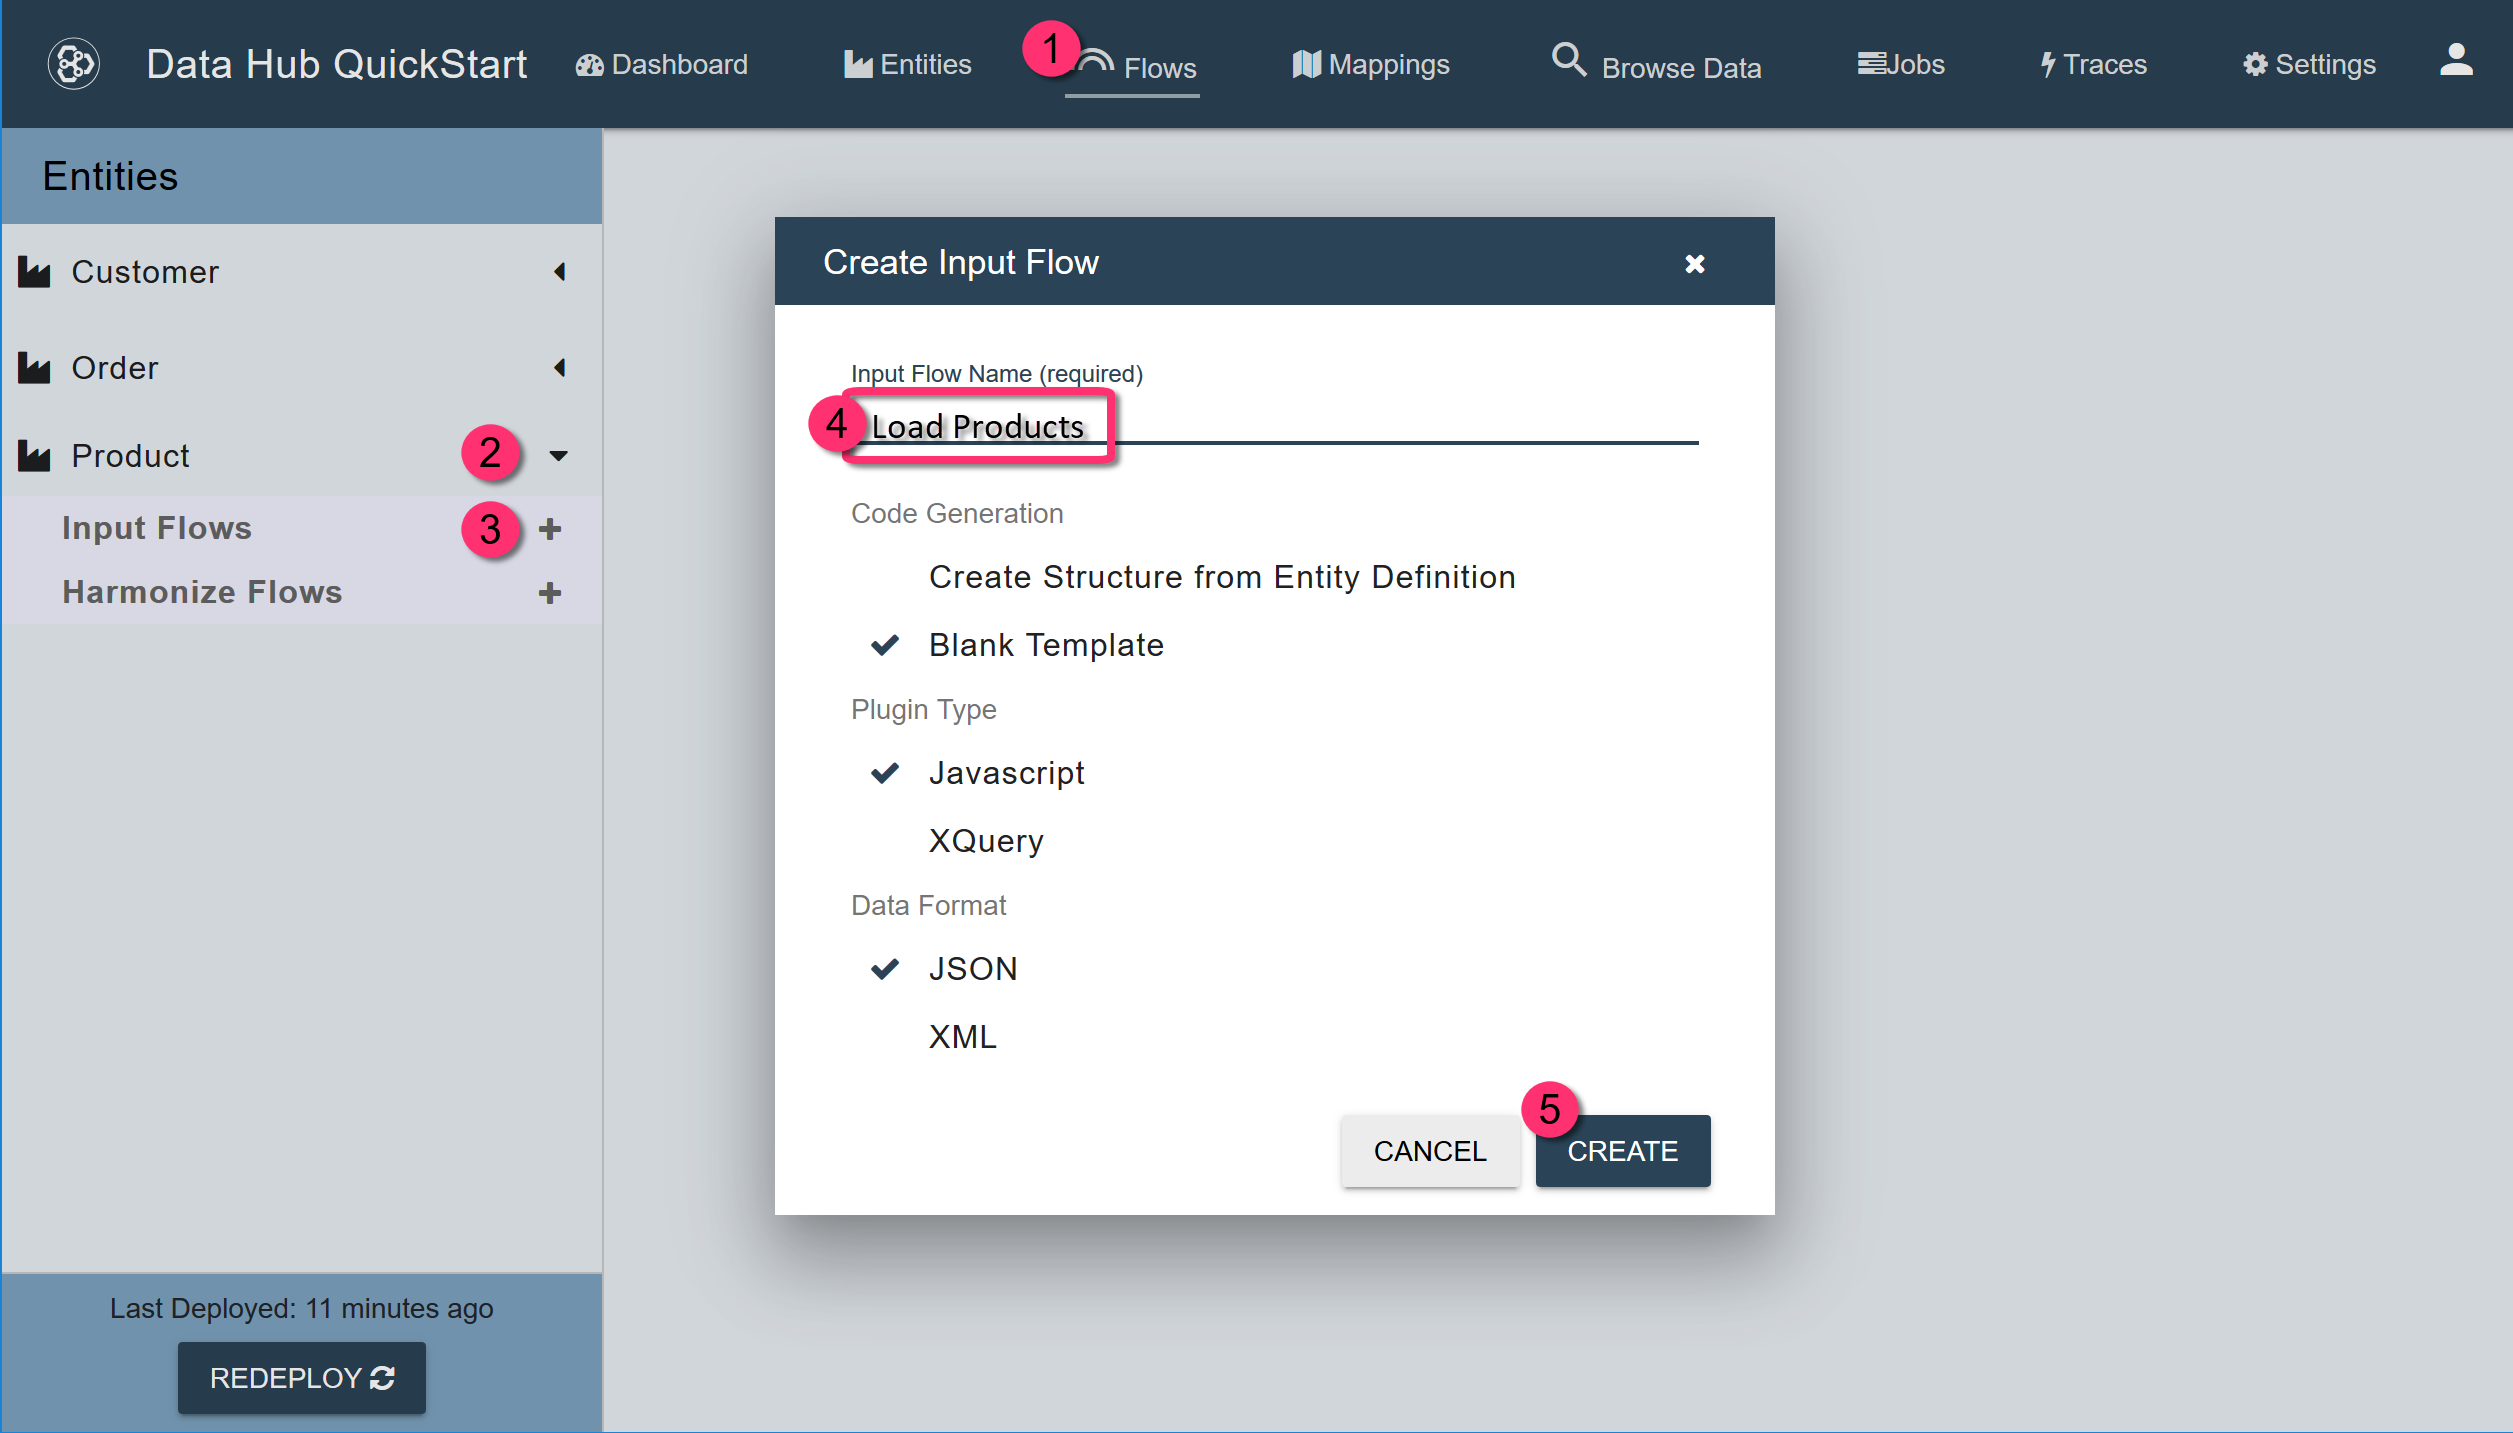
- In QuickStart’s navigation bar, click Flows.
- Expand the tab named Product in the left panel.
- Click the + for Input Flows.
- In the Create Input Flow dialog, set Input Flow Name to
Load Products. - Click CREATE.
Result
- Your new flow appears under Input Flows in the left panel.
- The Run Input Flow wizard appears on the right.
2 - Configure and run the Load Products flow.
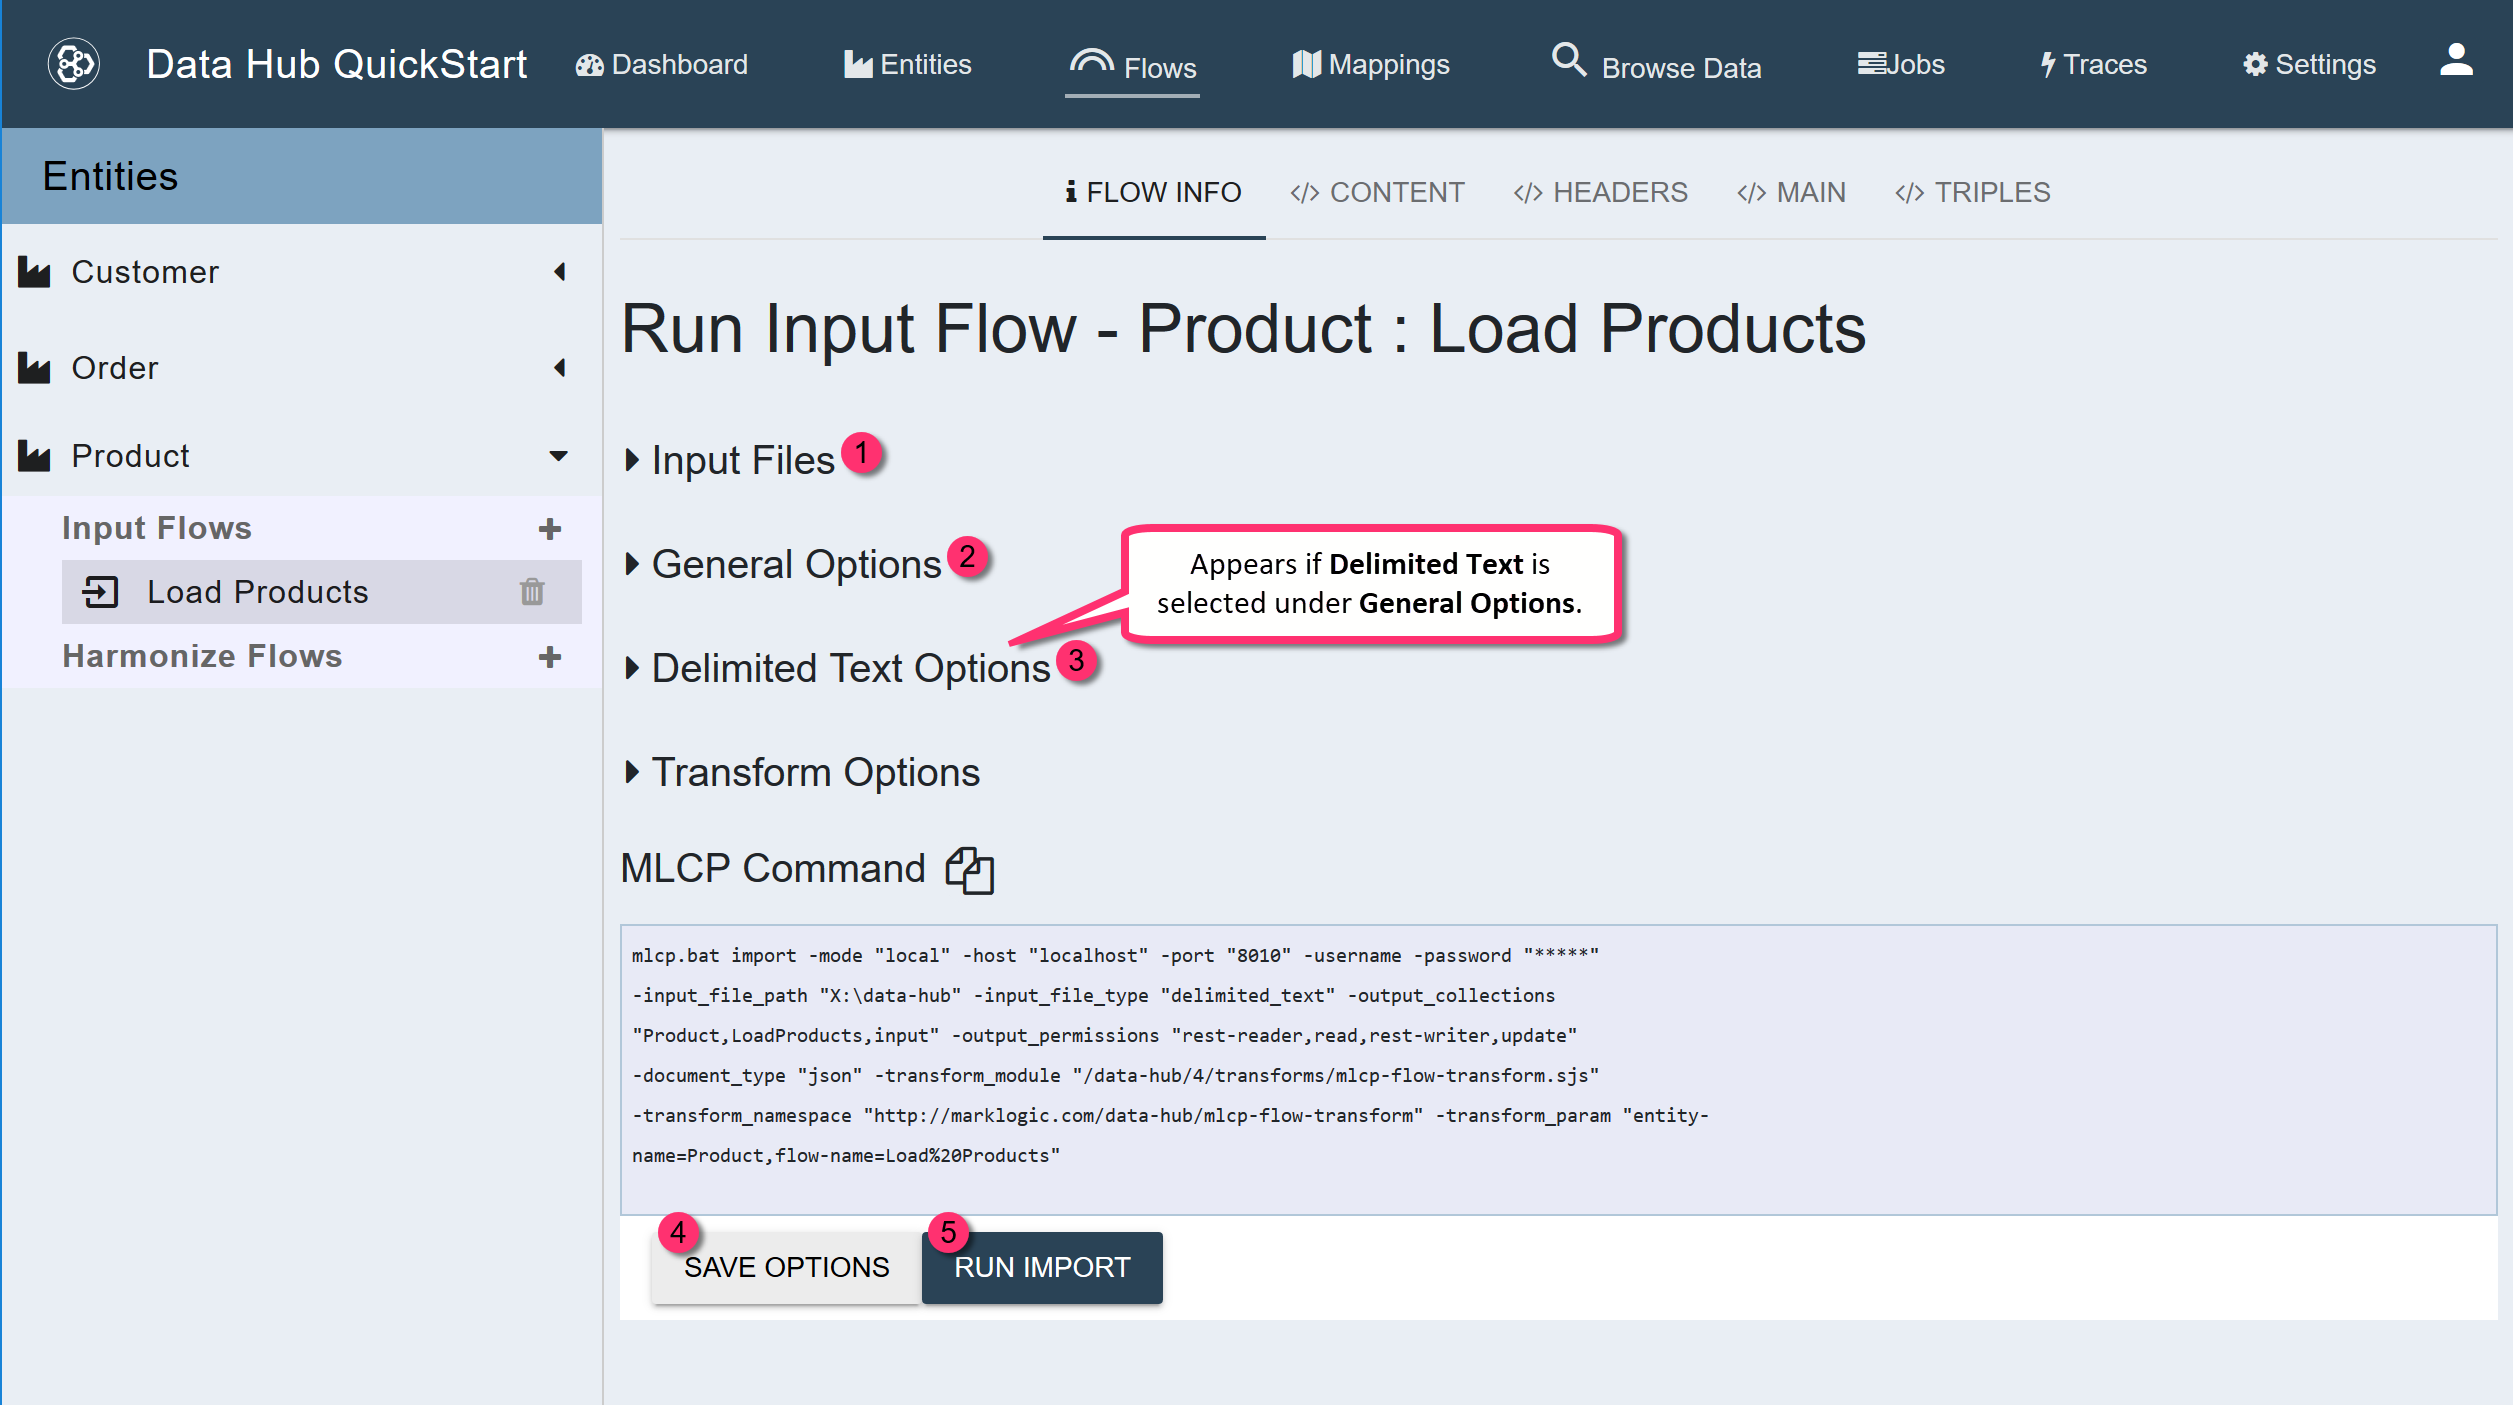
-
Under Input Files, use the file browser to select the
input\products\gamesdirectory.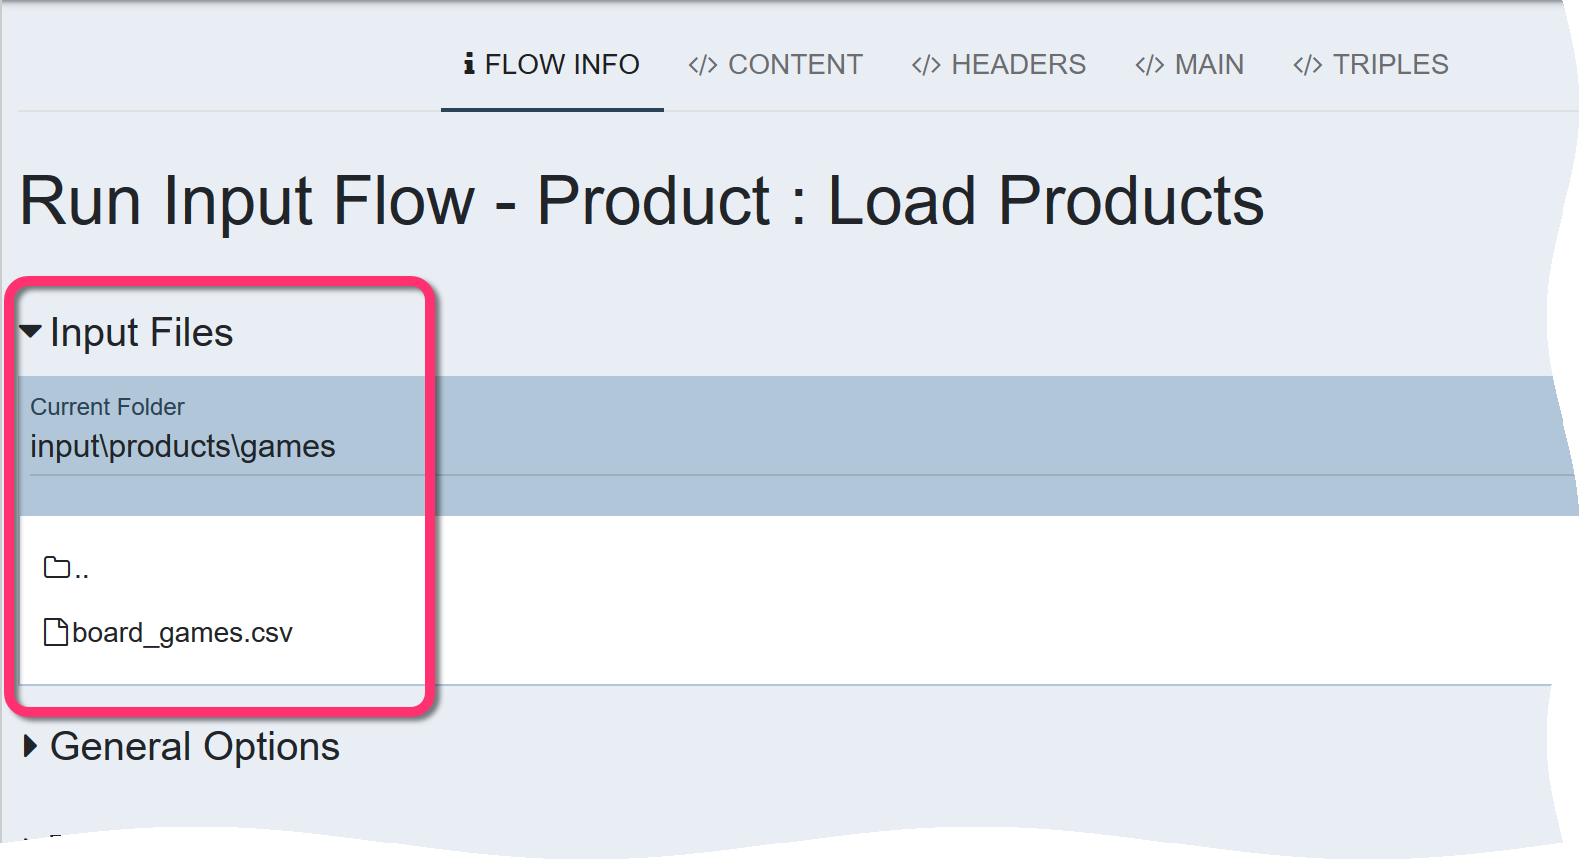
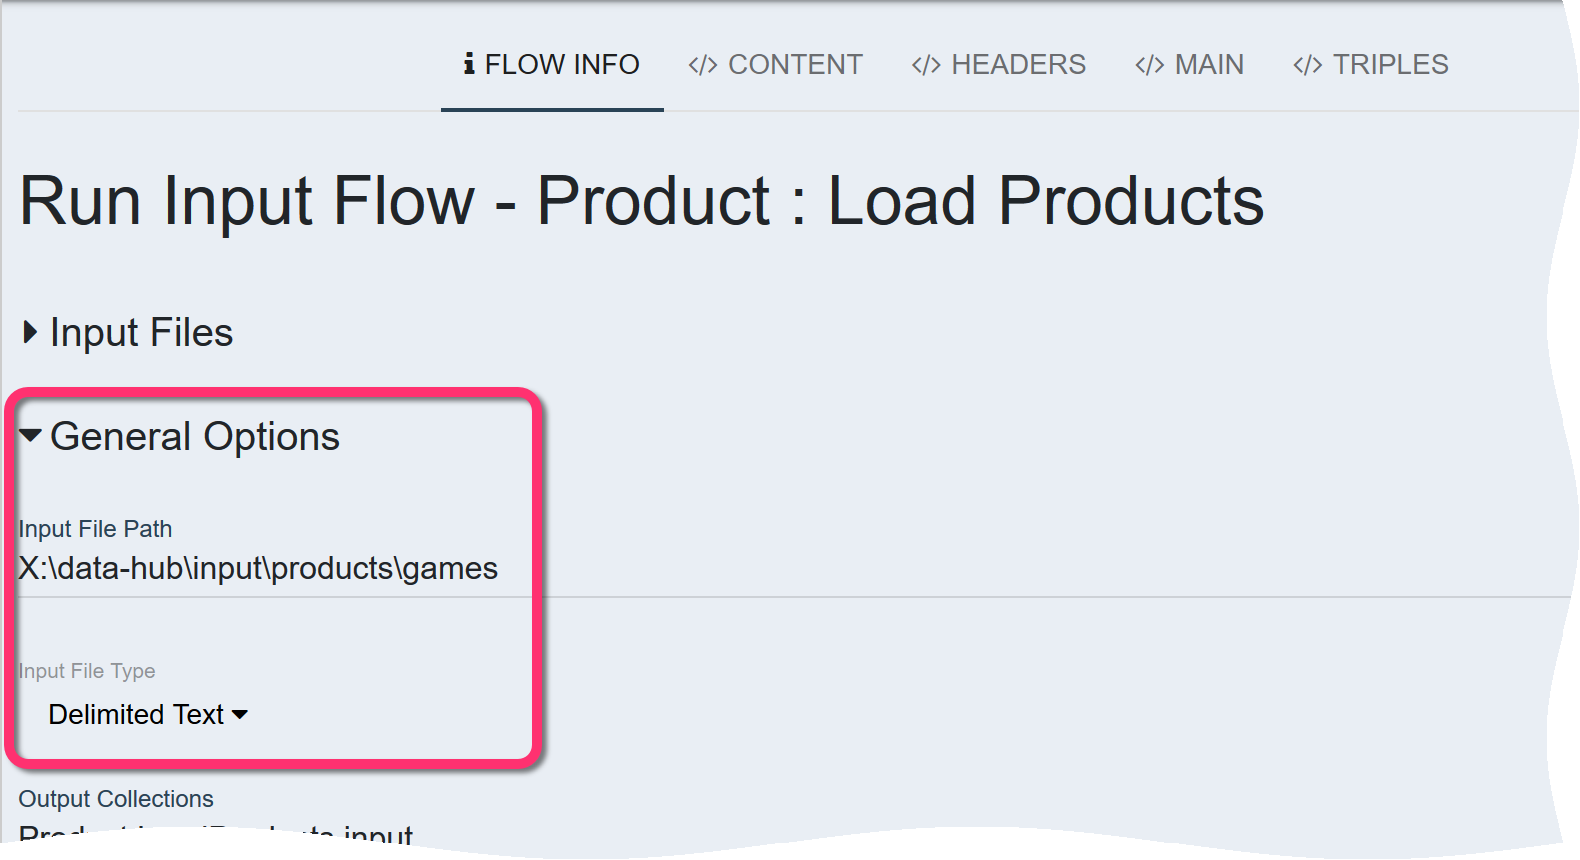
-
Under General Options, change Input File Type to Delimited Text.
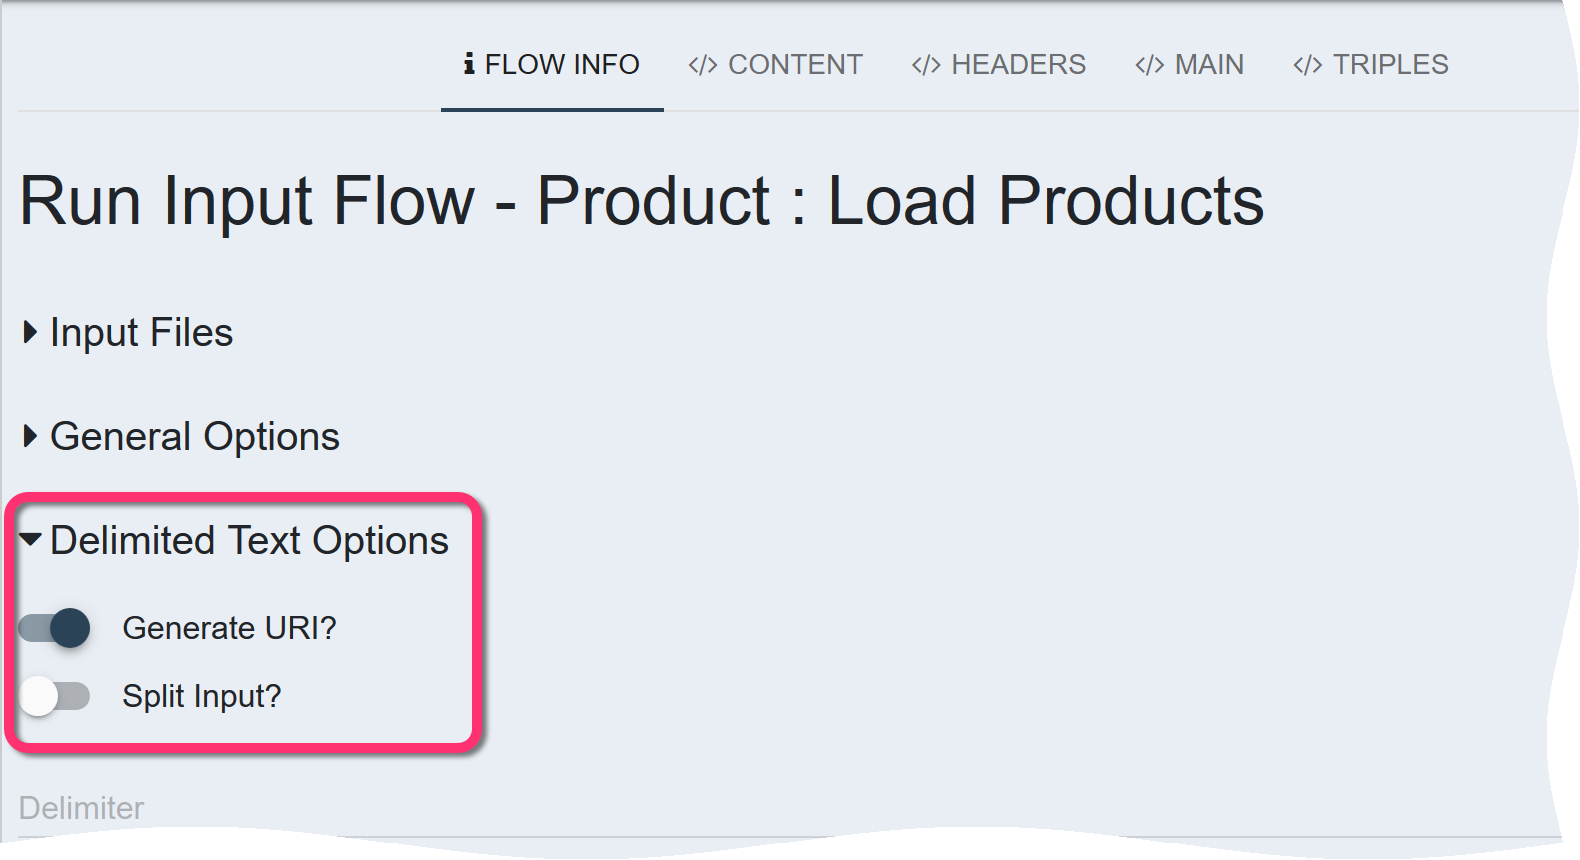
-
Under Delimited Text Options, enable the Generate URI? option to automatically generate a unique URI for each document you load.
- Click SAVE OPTIONS.
- Click RUN IMPORT.
Result
QuickStart displays a completion notice.

Order
Perform the same steps for Order.
1 - Create an input flow for the Order entity.
- Expand the tab named Order in the left panel.
- Click the + for Input Flows.
- In the Create Input Flow dialog, set Input Flow Name to
Load Orders. - Click CREATE.
2 - Configure and run the Load Orders flow.
-
Under Input Files, use the file browser to select the
input\ordersdirectory. -
Under General Options, change Input File Type to Delimited Text.
-
Under Delimited Text Options, enable the Generate URI? option to automatically generate a unique URI for each document you load.
- Click SAVE OPTIONS.
- Click RUN IMPORT.
Customer
Perform the same steps for Customer.
1 - Create an input flow for the Customer entity.
- Expand the tab named Customer in the left panel.
- Click the + for Input Flows.
- In the Create Input Flow dialog, set Input Flow Name to
Load Customers. - Click CREATE.
2 - Configure and run the Load Customers flow.
-
Under Input Files, use the file browser to select the
input\customersdirectory. -
Under General Options, change Input File Type to Delimited Text.
-
Under Delimited Text Options, enable the Generate URI? option to automatically generate a unique URI for each document you load.
- Click SAVE OPTIONS.
- Click RUN IMPORT.