Tutorial: Securing Personally Identifiable Information
Securing personally identifiable information (PII) was introduced in DHF v4.0.0. To protect PII, the PII fields must be identified in the entity model. Then QuickStart automatically generates PII security configuration files, which we will deploy to the FINAL database.
We have already loaded the Customer raw data by:
In this section, we will:
- Define the entity model by adding properties to the entity model.
- Define the source-to-entity mapping to specify which field in the dataset corresponds to the properties in the entity model.
- Create and run the Harmonize Flow.
- Deploy the configuration files.
1 - Define the Entity Model
To simplify this tutorial, we are going to harmonize only the primary key (id) and two fields that we choose to protect as PII (billing_address and shipping_address).
| Name | Type | Other settings | Notes |
|---|---|---|---|
id |
string | key | Unique for each customer. |
billing_address |
string | PII | |
shipping_address |
string | PII |
To define the Customer entity model,
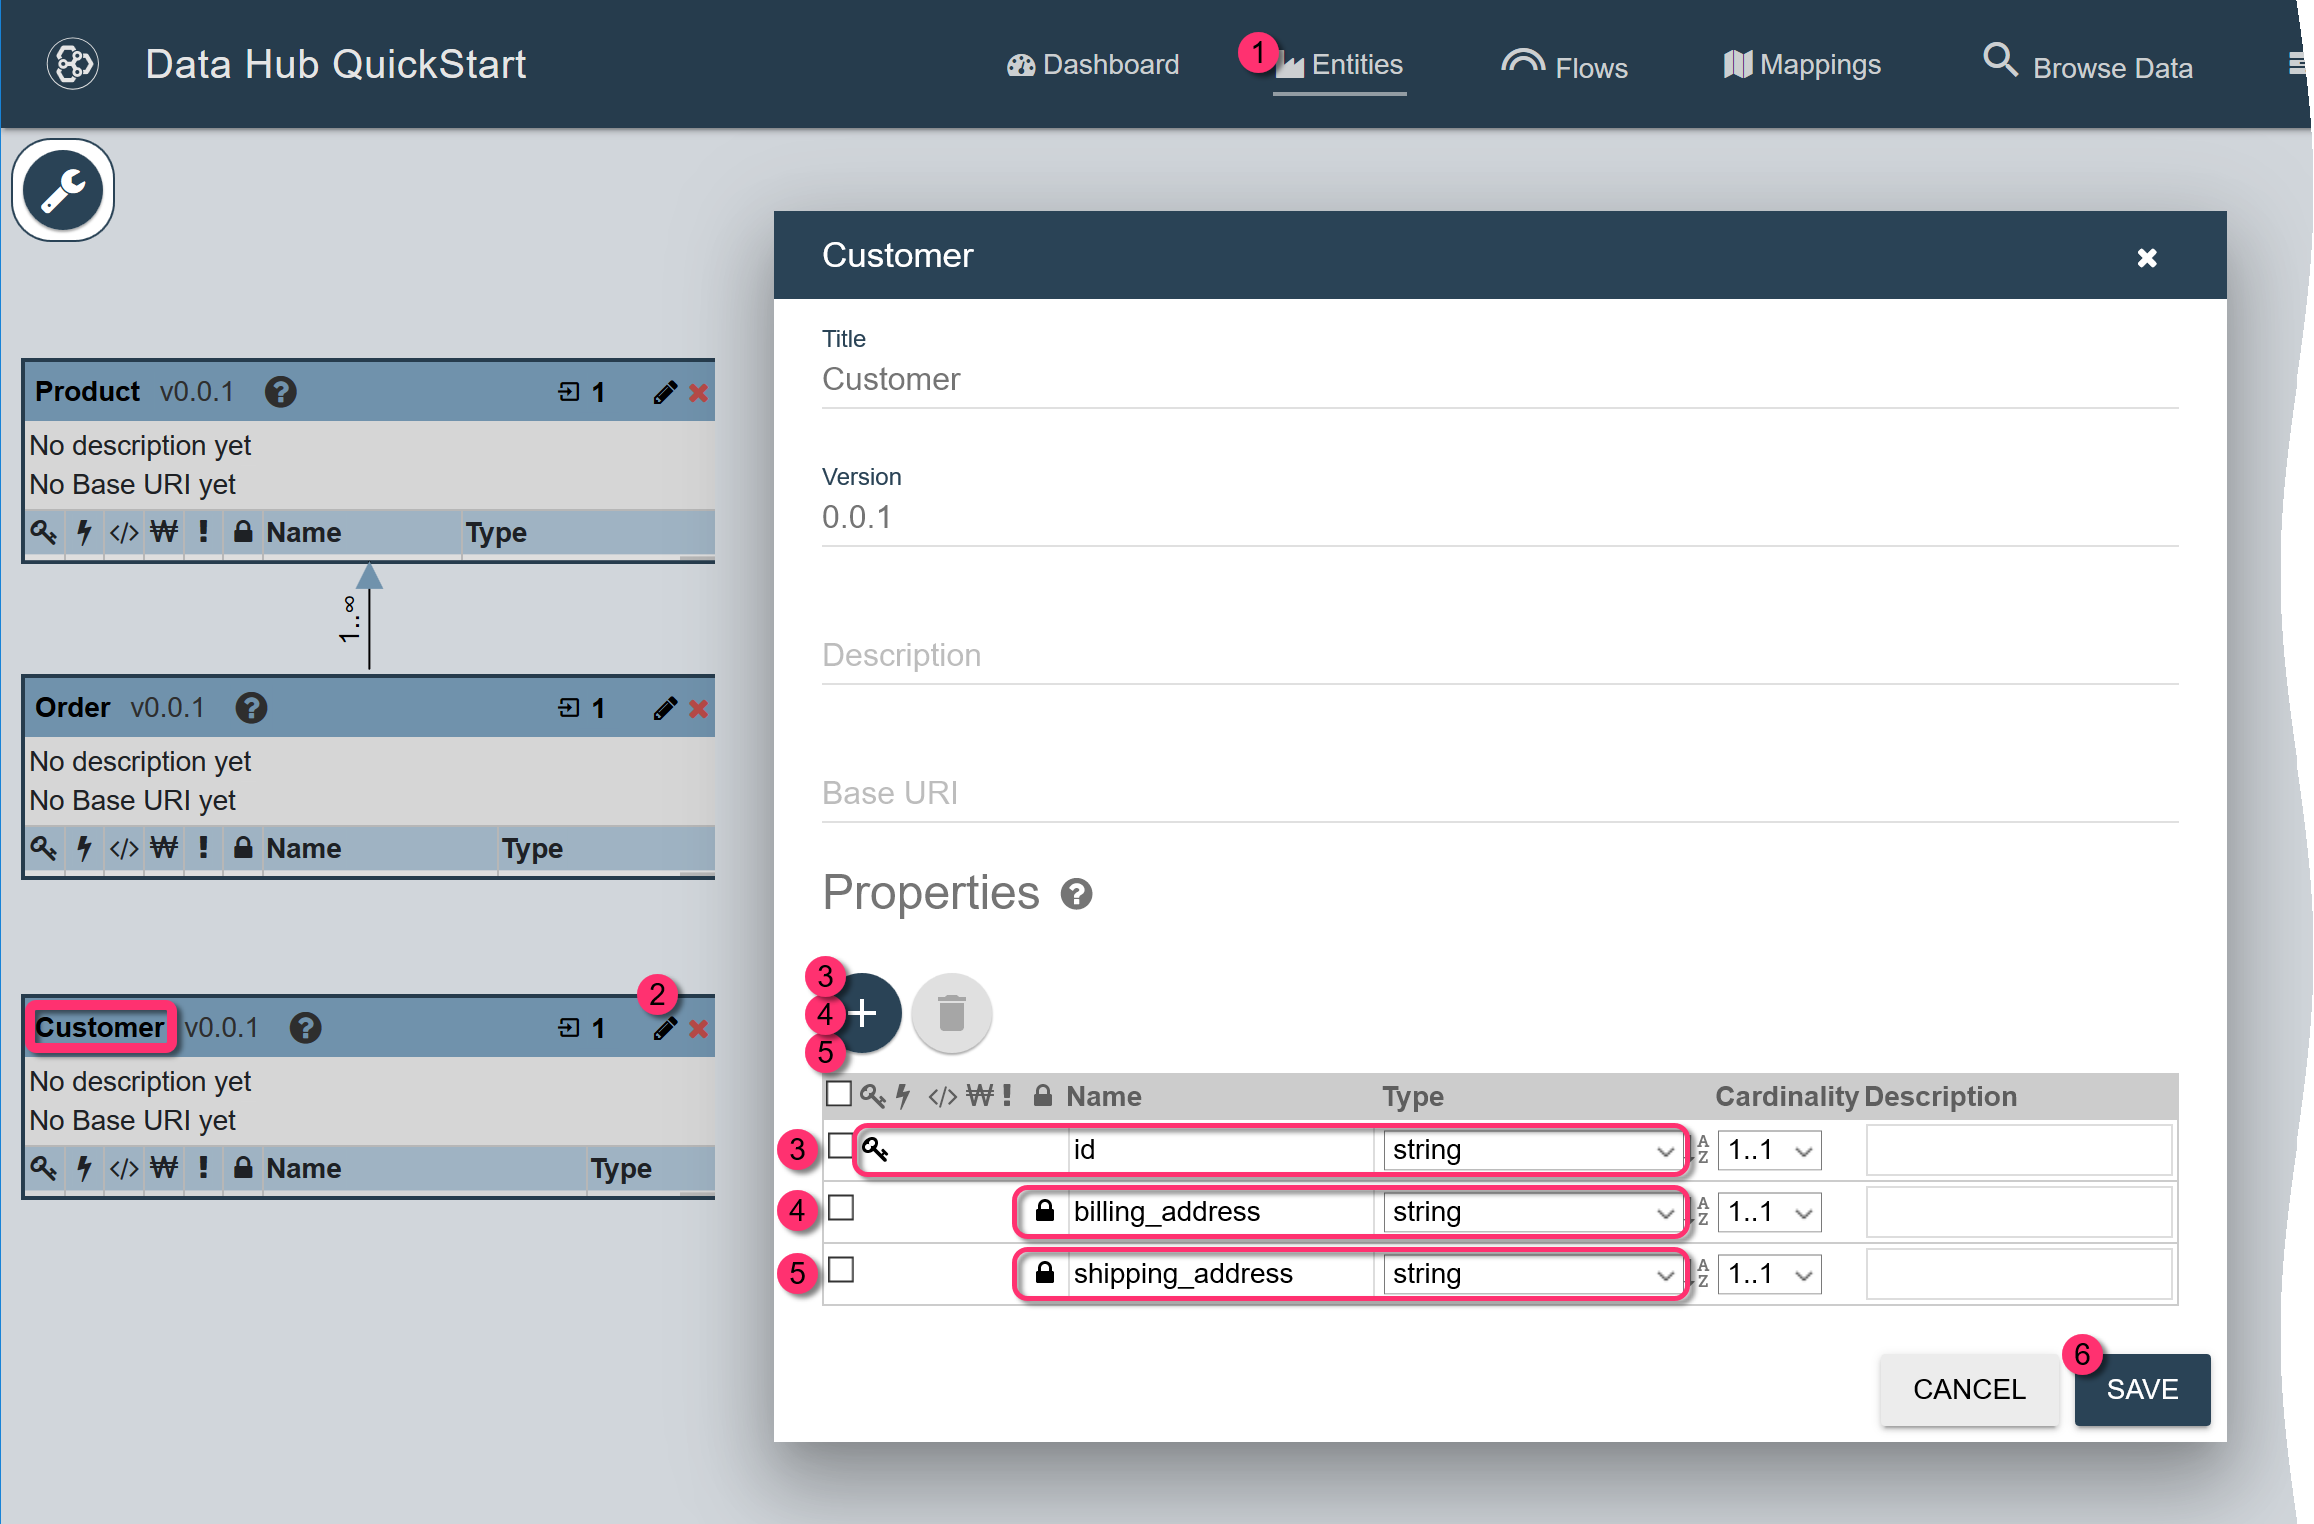
- In QuickStart's navigation bar, click .
- At the top of the Customer entity card, click the pencil icon to edit the Customer entity definition.
-
In the Customer entity editor, click in the Properties section to add a new property.
- Set Name to
id. - Set Type to
string. - To make
idthe primary key, click the area in the key column for theidrow.
- Set Name to
-
Click again to add another property.
- Set Name to
billing_address. - Set Type to
string. - To mark
billing_addressas PII, click the area in the key column for thebilling_addressrow.
- Set Name to
-
Click again to add another property.
- Set Name to
shipping_address. - Set Type to
string. - To mark
shipping_addressas PII, click the area in the key column for theshipping_addressrow.
- Set Name to
- Click .
-
If prompted to update the index, click .

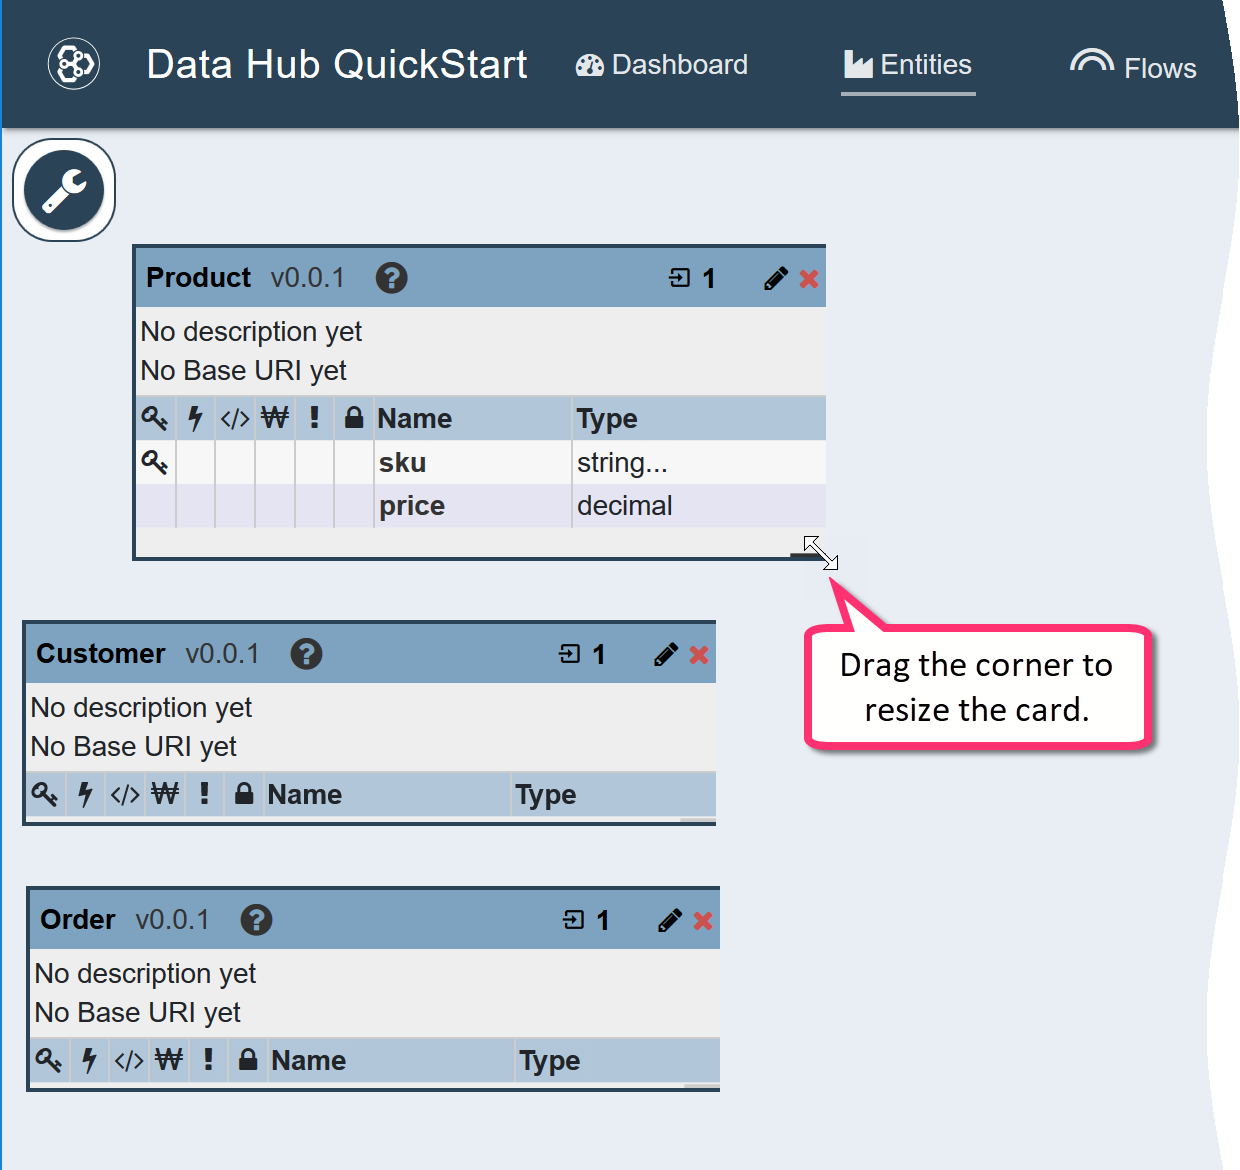
-
Drag the bottom-right corner of the entity card to resize it and see the newly added properties.
2 - Define the Mappings
Because the information can easily be mapped between the source dataset and the entity model, we will create the following source-to-entity mappings:
| field in raw dataset (type) | property in entity model (type) | Notes |
|---|---|---|
id (string) |
id (string) |
No changes |
billing_address (string) |
billing_address (string) |
No changes |
shipping_address (string) |
shipping_address (string) |
No changes |
To create a mapping named Customer Mapping,
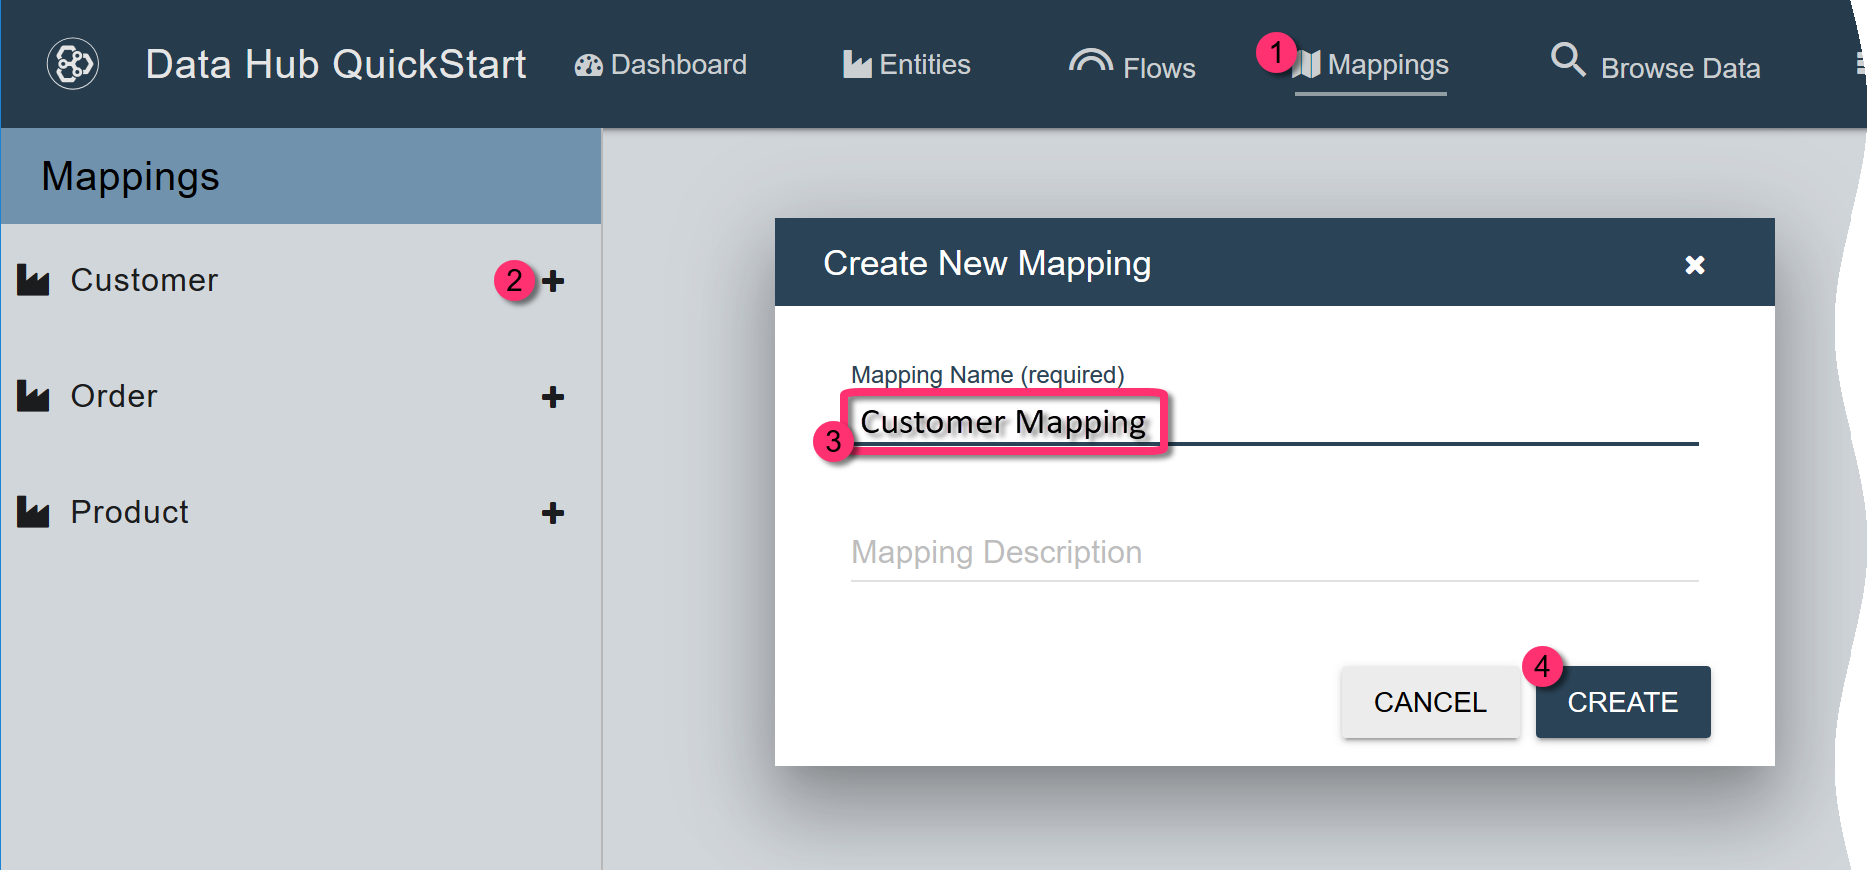
- In QuickStart’s navigation bar, click Mapping.
- In the left panel, click the + icon for the Customer entity.
- In the Create New Mapping form, set Mapping Name to
Customer Mapping. - Click CREATE.
Your new mapping appears under the tab named Customer in the left panel.
The mapping editor displays a row for each property in your entity model. In each row,
- the right column displays the entity property, and
- the left column contains a dropdown list from which you can select the source field that corresponds to that entity property.
To configure the mapping,
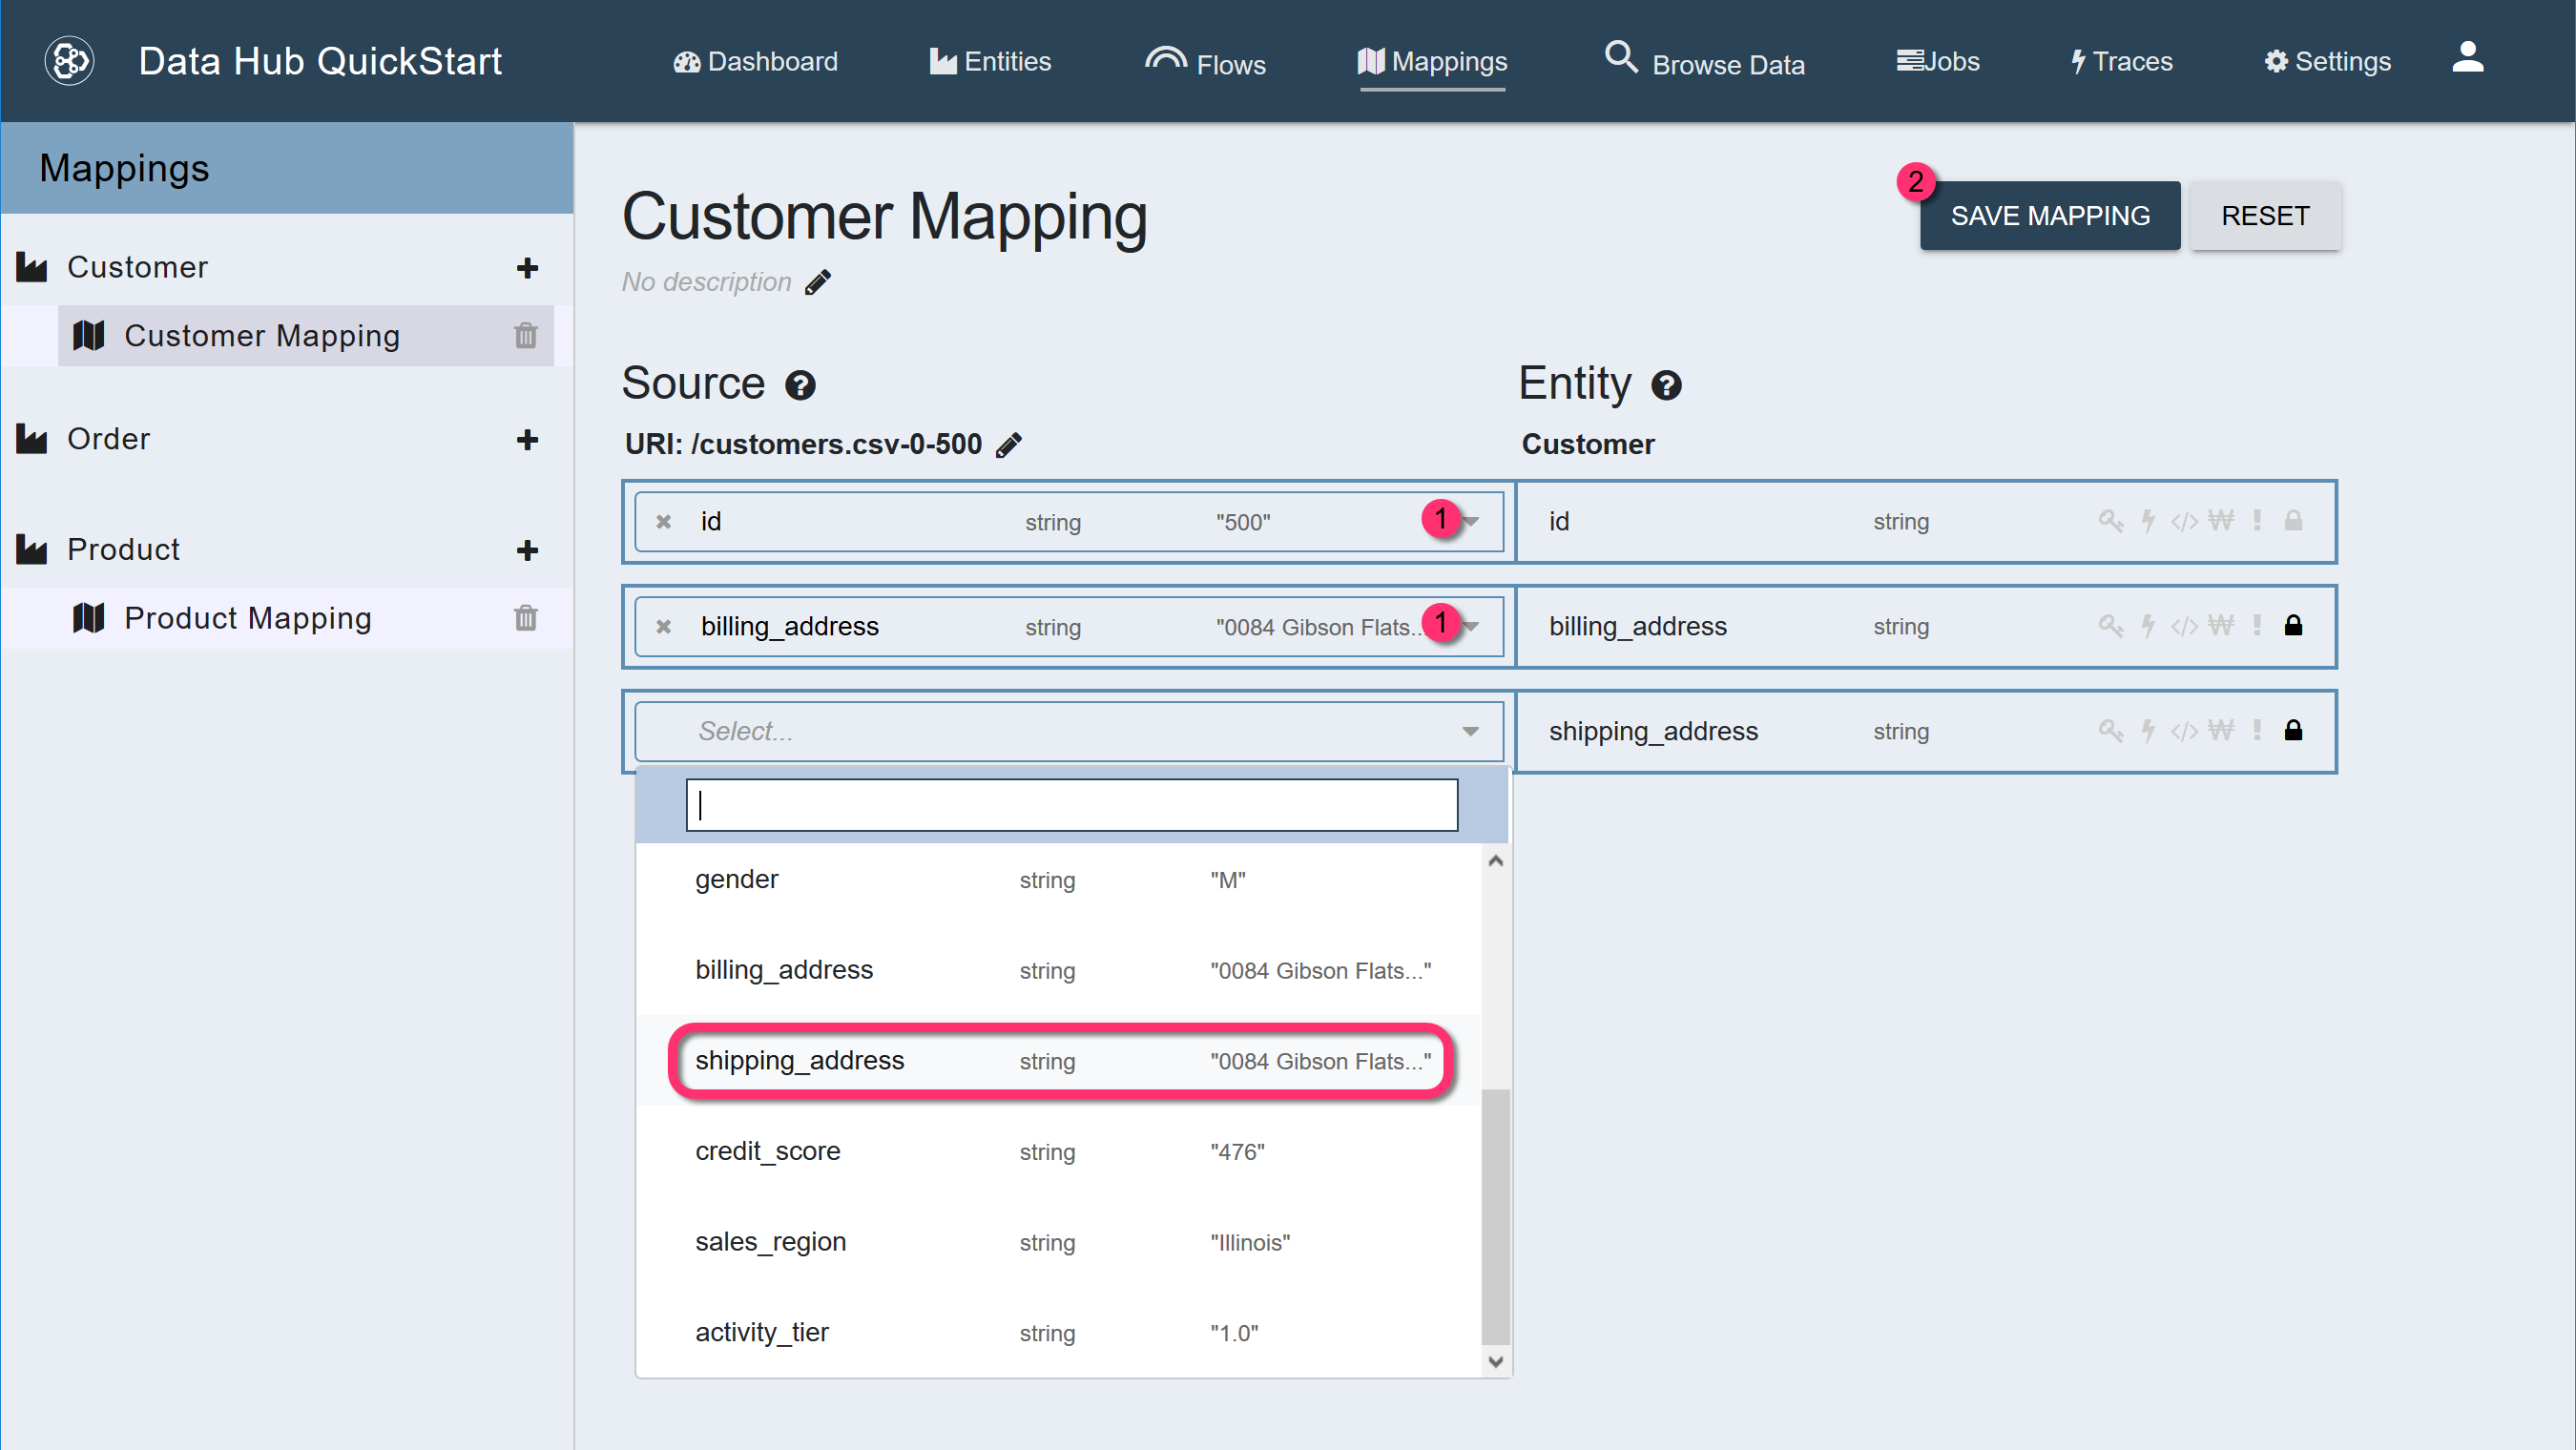
-
For each entity property, expand the dropdown list under Source and select the source field that corresponds to that entity property.
TIP: You can enter part of the field name to filter the dropdown list.
-
Click SAVE MAPPING.
3 - Create and Run the Harmonize Flow
Harmonization uses the data in your STAGING database to generate canonical entity instances in the FINAL database.
To create a harmonization flow for the Customer entity,
- In QuickStart’s navigation bar, click Flows.
- Expand the tab named Customer in the left panel.
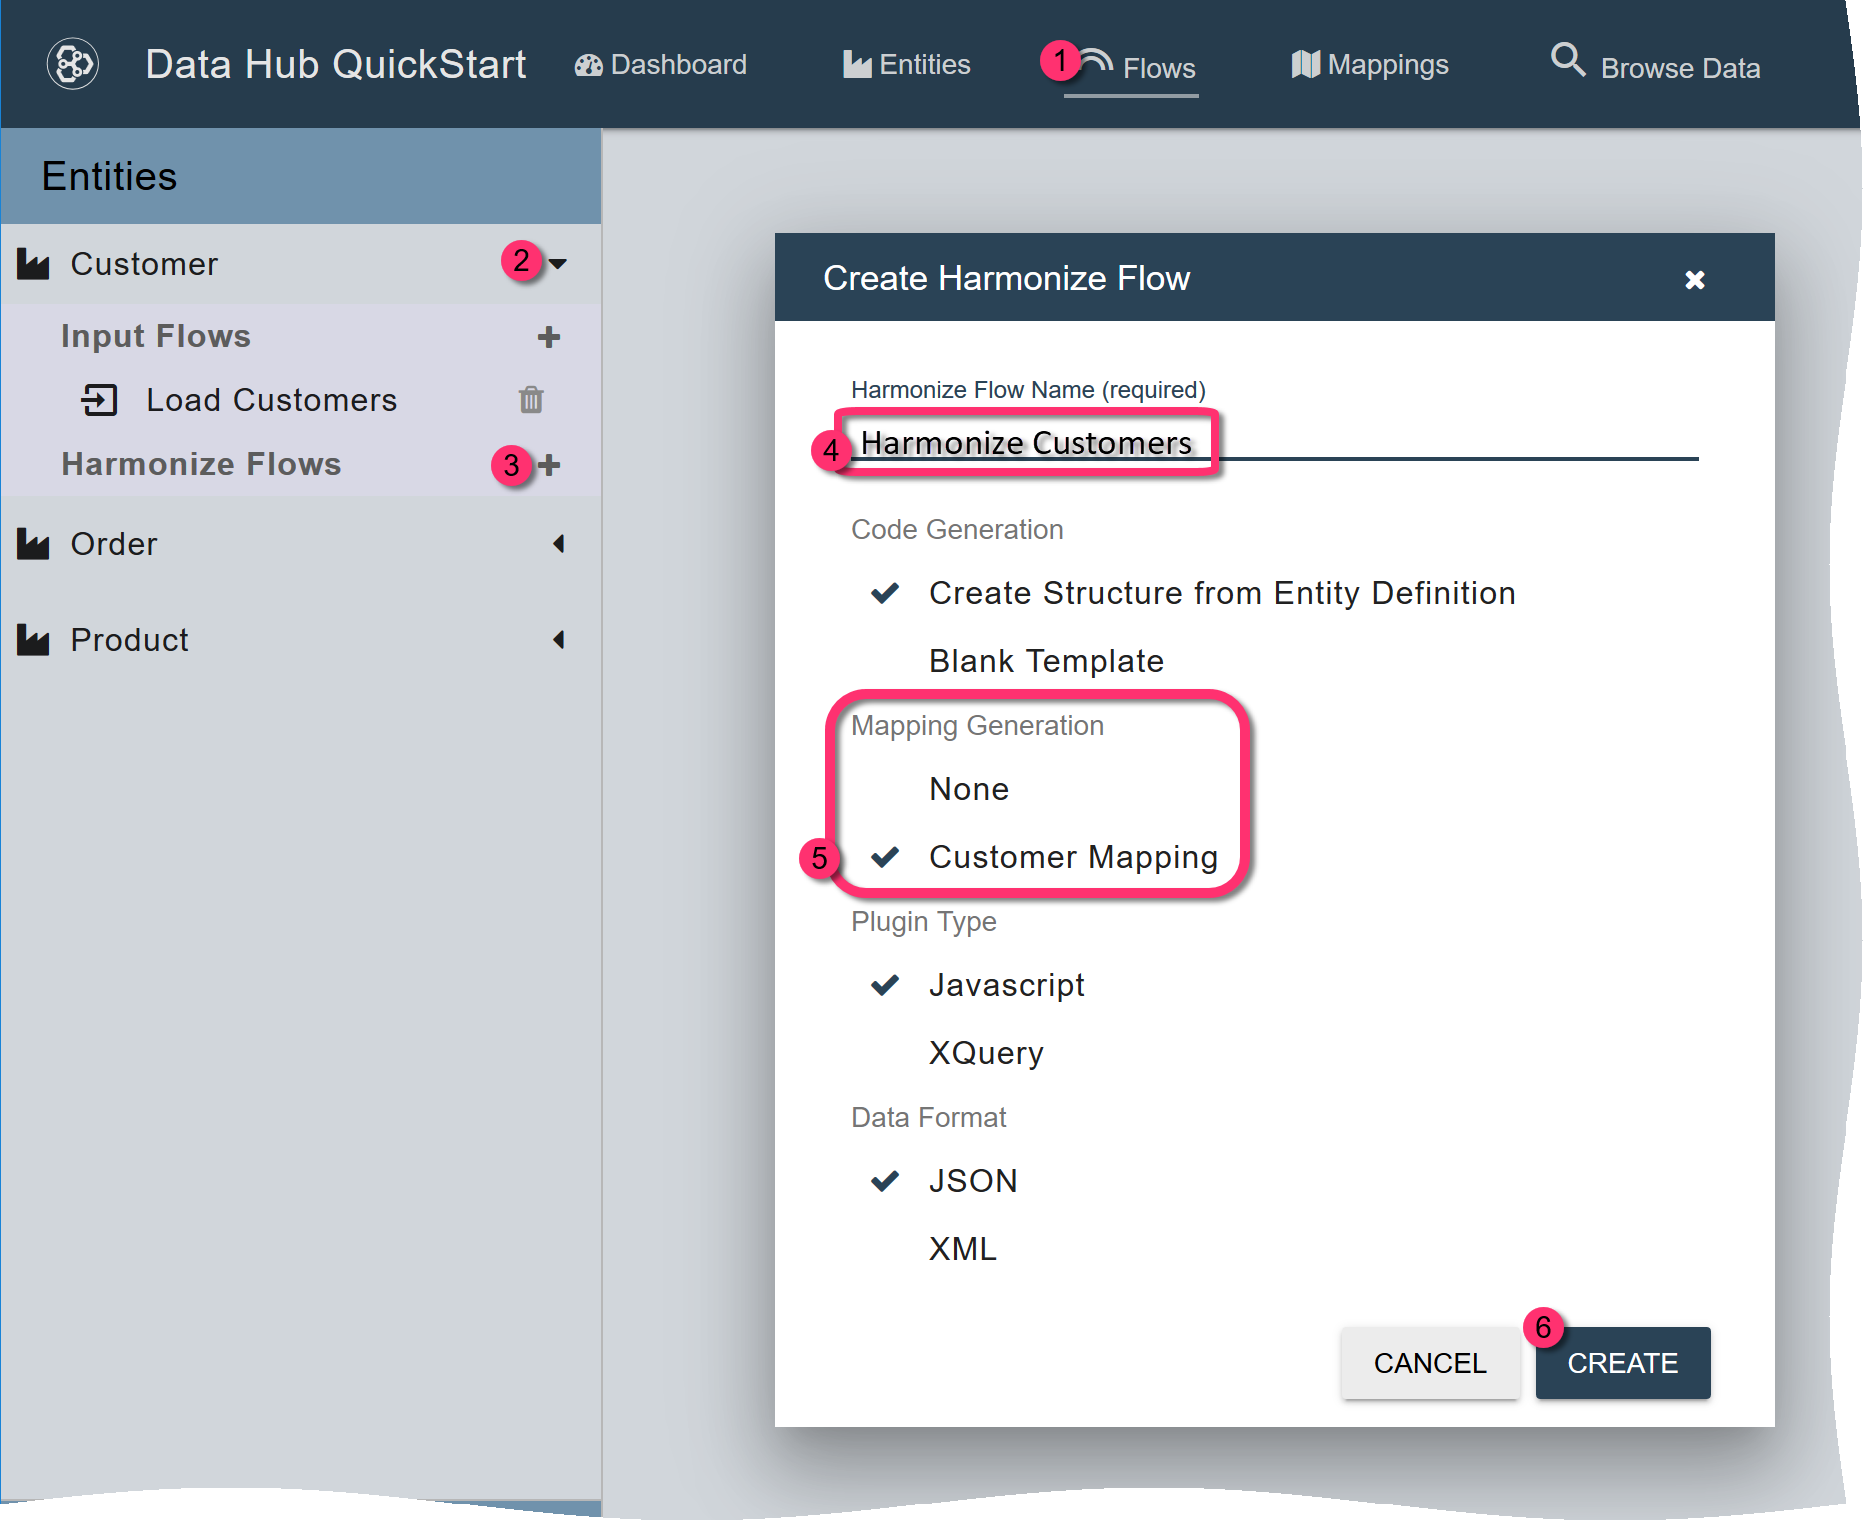
- Click the + for Harmonize Flows.
- In the Create Harmonize Flow dialog, set Harmonize Flow Name to
Harmonize Customers. -
Under Mapping Generation, check “ append: mappingcreated append: “ “. - Click CREATE.
When you create a flow with mapping, QuickStart automatically generates harmonization code based on the entity model and the mapping and then deploys the code to MarkLogic Server.
To run the harmonization flow,
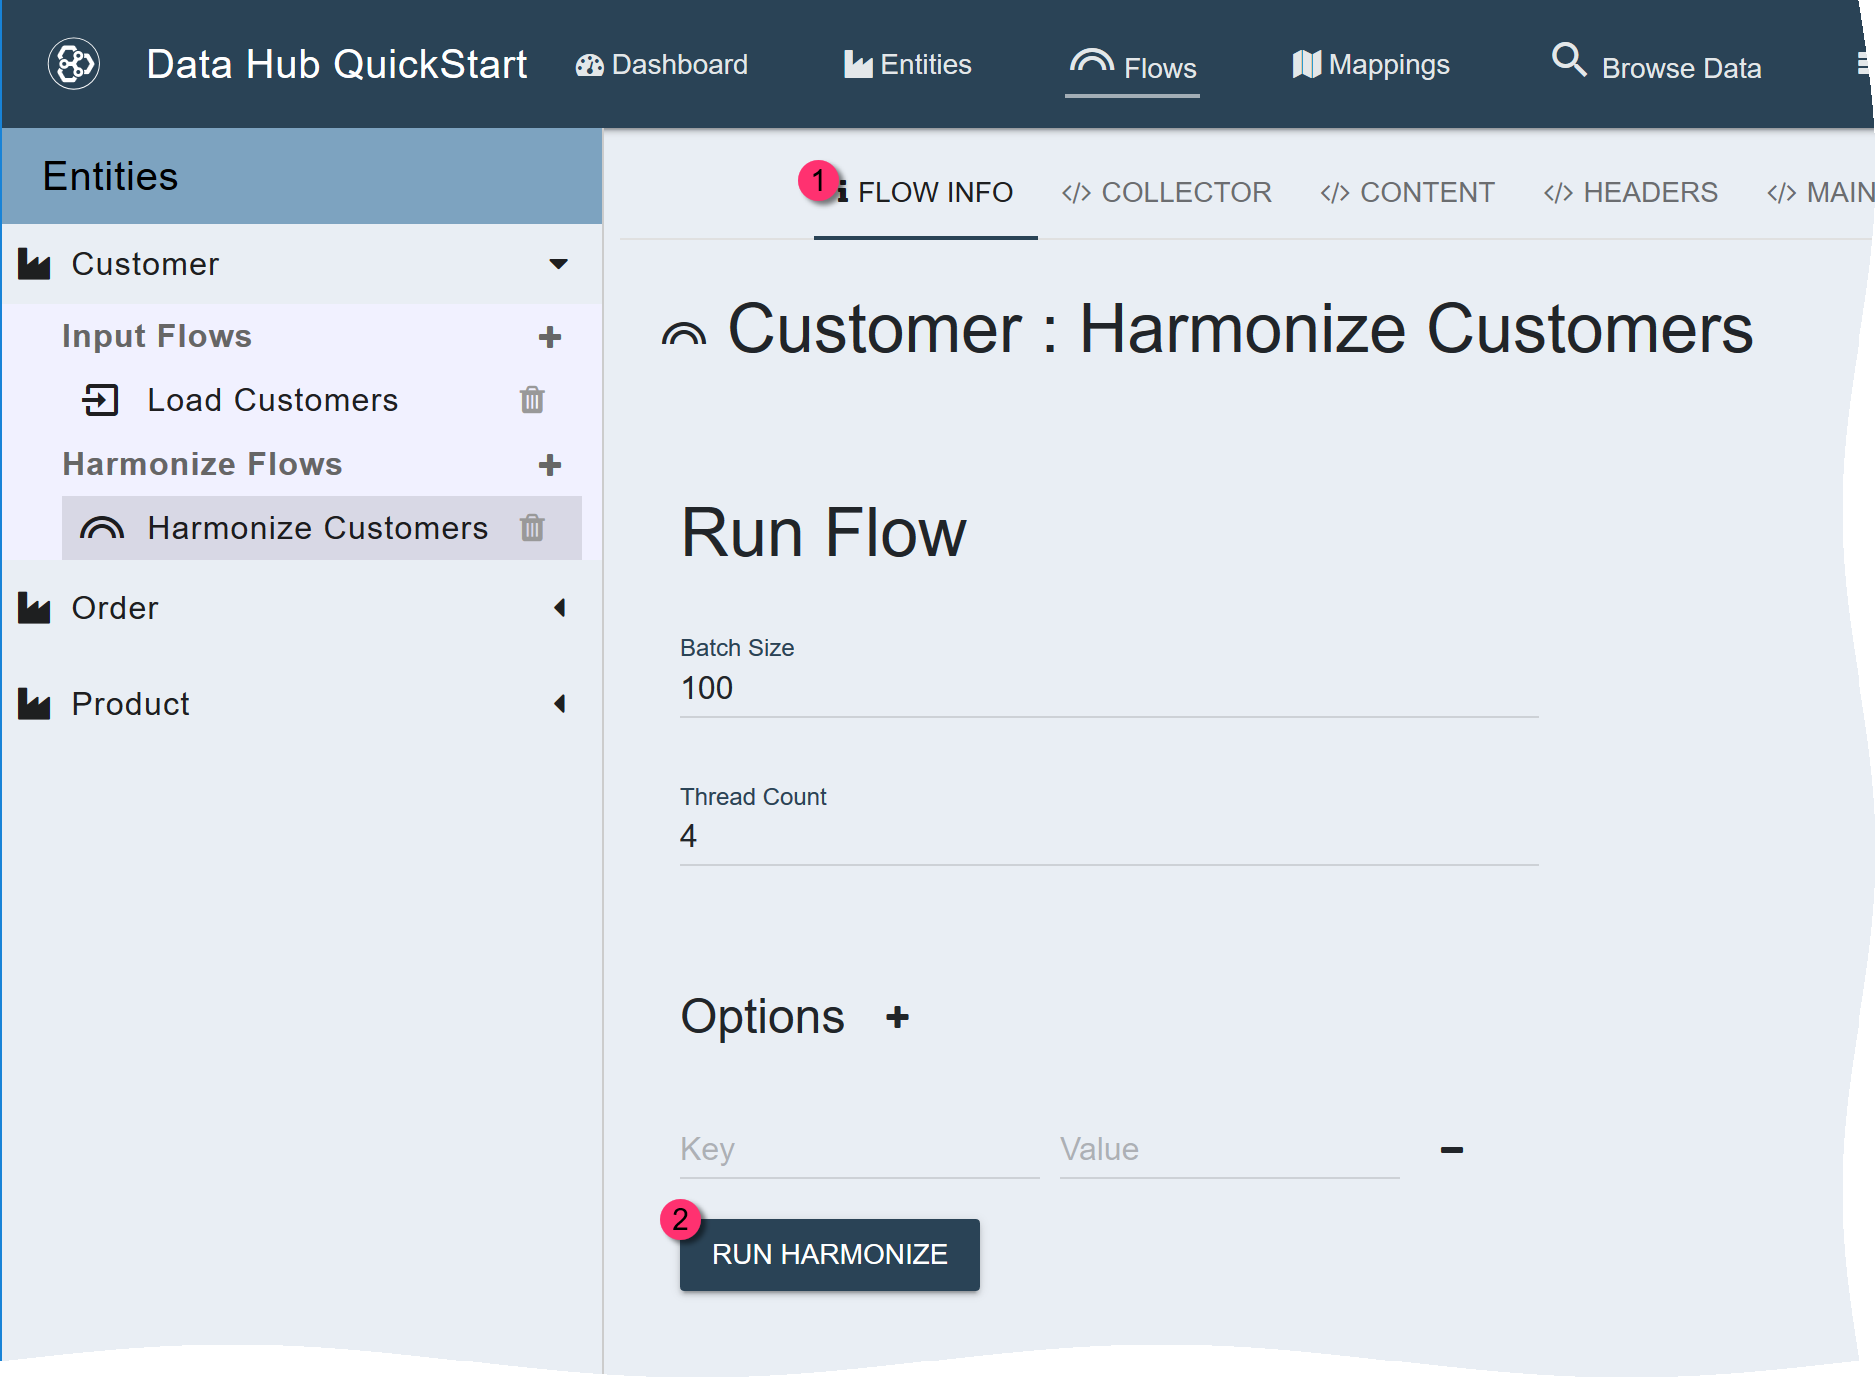
- Click the Flow Info tab.
- Click Run Harmonize.
4 - Deploy the Configuration Files
To deploy the PII security configuration files to the FINAL database,
-
In the
gradle.propertiesfile, setmlSecurityUsernameandmlSecurityPasswordto your MarkLogic Server credentials.IMPORTANT: Your MarkLogic Server account must be assigned both
manage-adminandsecurityroles. - Open a command-line window, and navigate to your DHF project root directory.
-
At your project’s root folder, run the
mlDeploySecurityGradle task../gradlew mlDeploySecurity
gradlew.bat mlDeploySecurity
Only users with the pii-reader role will be able to view properties marked as PII in the documents they are allowed to view.